Starting with DIY air conditioner tune-up steps, this guide will walk you through the essential tasks to ensure your AC unit is in top shape. From cleaning filters to inspecting parts, every step is crucial for optimal performance.
As you follow along, you’ll learn the importance of each task and how it contributes to the overall efficiency of your air conditioner. Let’s dive into the details of maintaining your AC with these DIY tune-up steps.
Preparation for DIY Air Conditioner Tune-Up
When preparing for a DIY air conditioner tune-up, it is crucial to gather all the necessary tools and materials, ensure safety precautions are in place, and set up an ideal workspace for the task.
Essential Tools and Materials
- Socket and wrench set
- Screwdrivers
- Fin comb
- Condenser coil cleaner
- Filter replacement
- Thermometer
Importance of Safety Precautions
It is essential to prioritize safety before starting the tune-up process. This includes disconnecting the power supply, wearing safety goggles and gloves, and ensuring the unit is stable before working on it.
Ideal Workspace Setup
- Work in a well-ventilated area
- Ensure proper lighting for visibility
- Have a flat and stable surface to work on
- Keep the workspace clutter-free to avoid accidents
Cleaning the Air Conditioner Components: DIY Air Conditioner Tune-up Steps

To maintain the efficiency and prolong the lifespan of your air conditioner, it is crucial to regularly clean its components. This not only ensures optimal performance but also helps in maintaining good indoor air quality.
Cleaning the Air Filters
Air filters are an essential component of an air conditioner as they trap dust, dirt, and other particles to prevent them from circulating in your home. Follow these steps to clean the air filters effectively:
- Turn off the power to the air conditioner before removing the filter.
- Locate the air filter, which is typically found behind the front grille or in the air handler unit.
- Remove the filter and inspect it for any visible dirt or debris.
- If the filter is reusable, wash it with mild soap and water. Let it dry completely before reinstalling.
- If the filter is disposable, replace it with a new one according to the manufacturer’s recommendations.
- Regularly check and clean or replace the air filter every 1-3 months to ensure proper airflow.
Cleaning the Evaporator Coils
The evaporator coils are responsible for absorbing heat from the indoor air. Over time, these coils can accumulate dust and dirt, reducing the efficiency of the air conditioner. Here’s how you can clean the evaporator coils effectively:
- Turn off the power to the air conditioner before accessing the coils.
- Locate the evaporator coils, which are typically found in the air handler unit or above the furnace.
- Use a soft brush to gently remove the dust and debris from the coils. Avoid using sharp objects that could damage the coils.
- If there is stubborn dirt buildup, use a mixture of water and mild detergent to carefully clean the coils.
- Rinse the coils with clean water and allow them to dry completely before turning the power back on.
Cleaning the Condenser Coils and Fins
The condenser coils and fins are located in the outdoor unit of the air conditioner and are responsible for releasing the heat absorbed from the indoor air. To ensure optimal performance, follow these steps to clean the condenser coils and fins:
- Turn off the power to the air conditioner before cleaning the condenser unit.
- Remove any debris, such as leaves or twigs, from the exterior of the unit using a soft brush or vacuum cleaner.
- Gently clean the condenser coils with a coil cleaner or a mixture of water and mild detergent to remove dirt and grime.
- Use a fin comb to straighten any bent fins on the condenser unit for proper airflow.
- Rinse the coils and fins with a hose to remove any remaining dirt or cleaning solution.
- Allow the unit to dry completely before restoring power to the air conditioner.
Inspecting and Replacing Parts

Inspecting and replacing parts of an air conditioner is crucial to ensure optimal performance and longevity of the system. Regular maintenance helps prevent breakdowns and costly repairs in the future.
Inspecting Fan Blades and Motor
Inspecting the fan blades and motor is essential as they play a key role in the airflow and cooling process of the air conditioner. To check for wear and tear:
- Turn off the power to the air conditioner before inspecting.
- Visually inspect the fan blades for any signs of damage such as cracks or chips.
- Check the motor for any unusual noises or vibrations that may indicate a problem.
- If any issues are detected, consider replacing the fan blades or motor to avoid further damage.
Checking and Replacing Worn-out Belts
The belts in an air conditioner are responsible for transferring power from the motor to the fan and compressor. To check and replace worn-out belts:
- Turn off the power to the air conditioner before starting.
- Inspect the belts for cracks, fraying, or signs of wear.
- If the belts show any signs of damage, they should be replaced with new ones of the same size and type.
- Proper tension should be applied to the new belts to ensure efficient operation.
Inspecting and Replacing Refrigerant, DIY air conditioner tune-up steps
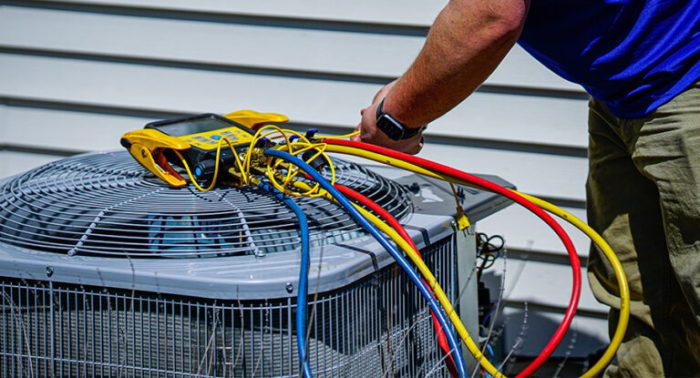
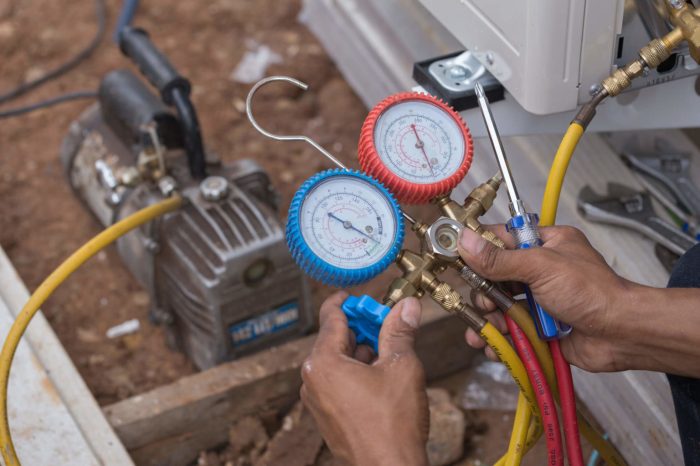
The refrigerant is a crucial component in the cooling process of an air conditioner. To inspect and replace the refrigerant:
- Check the refrigerant levels using a pressure gauge to ensure they are within the manufacturer’s recommended range.
- If the refrigerant levels are low, it may indicate a leak in the system that needs to be repaired before adding more refrigerant.
- Refrigerant should be handled carefully and replaced by a professional if there are any leaks or issues with the system.
Checking and Adjusting Settings
Properly calibrating and adjusting the settings of your air conditioner is essential for optimal performance and energy efficiency. This includes checking the thermostat, refrigerant levels, and airflow settings.
Calibrating the Thermostat
1. Turn on your air conditioner and set the thermostat to a desired temperature.
2. Use a separate thermometer to compare the temperature of the room with the reading on the thermostat.
3. If there is a discrepancy, adjust the calibration of the thermostat according to the manufacturer’s instructions.
Calibrating the thermostat ensures accurate temperature control and prevents the system from overworking or underperforming.
Checking Refrigerant Levels
1. Locate the refrigerant lines and check for any signs of leaks or damage.
2. Use a refrigerant pressure gauge to measure the pressure levels in the system.
3. If the pressure is too low or too high, consult a professional to adjust the refrigerant levels accordingly.
Maintaining proper refrigerant levels is crucial for the cooling efficiency of your air conditioner.
Adjusting Airflow Settings
1. Inspect the air filters and vents for any obstructions or blockages.
2. Clean or replace dirty filters to ensure proper airflow throughout the system.
3. Adjust the airflow settings on the vents to direct air where it is needed most effectively.
Optimizing airflow settings helps the air conditioner distribute cool air evenly and efficiently throughout the space.
Ending Remarks

In conclusion, by regularly performing these DIY air conditioner tune-up steps, you can extend the lifespan of your unit and enjoy consistent cooling during hot days. Keep your AC running smoothly by following these maintenance procedures and ensure a comfortable environment in your home.
When it comes to maintaining your air conditioner, cleaning the coils is essential for optimal performance. To learn how to clean air conditioner coils properly, follow this comprehensive guide: How to clean air conditioner coils. Additionally, improving the efficiency of your air conditioner can save energy and money.
Check out this informative article on how to improve air conditioner efficiency for practical tips. Lastly, homeowners should follow a maintenance checklist to ensure their AC unit runs smoothly. Find out more about an AC maintenance checklist for homeowners to keep your system in top condition.
When it comes to maintaining your air conditioner, cleaning the coils is crucial. Follow this guide on how to clean air conditioner coils to ensure your unit functions efficiently. Additionally, improving air conditioner efficiency is essential for reducing energy consumption.
Learn effective tips on how to improve air conditioner efficiency to save money on utility bills. Homeowners should also refer to this comprehensive AC maintenance checklist for homeowners to keep their unit in top condition.