DIY air conditioner maintenance guide introduces essential practices to ensure your air conditioner functions efficiently, saving you from costly repairs and extending its lifespan. From cleaning air filters to inspecting refrigerant levels, this comprehensive guide covers all aspects of maintaining your AC unit.
Importance of DIY Air Conditioner Maintenance
Regular maintenance of an air conditioner is crucial for ensuring optimal performance and efficiency. By conducting DIY maintenance tasks, homeowners can reap several benefits that contribute to the overall well-being of their cooling system.
Benefits of Regular Maintenance
- Improved Energy Efficiency: Cleaning or replacing air filters, coils, and fins can help the air conditioner operate more efficiently, leading to reduced energy consumption and lower utility bills.
- Enhanced Indoor Air Quality: Regular maintenance prevents the buildup of dust, debris, and mold within the system, promoting cleaner and healthier indoor air for occupants.
- Extended Lifespan: Keeping the air conditioner well-maintained can prolong its lifespan, reducing the need for premature replacements and costly repairs.
Neglecting Maintenance
- Costly Repairs: Failure to perform regular maintenance can result in issues like compressor failure, refrigerant leaks, or frozen coils, leading to costly repairs or even the need for a full system replacement.
- Poor Performance: Neglected air conditioners may struggle to cool the space efficiently, resulting in uneven temperatures, increased humidity levels, and discomfort for occupants.
DIY Maintenance for Extended Lifespan
- Cleaning or replacing air filters every 1-3 months to ensure proper airflow and prevent strain on the system.
- Cleaning evaporator and condenser coils annually to maintain optimal heat transfer and efficiency.
- Straightening fins and clearing debris around the outdoor unit to promote proper airflow and prevent overheating.
Tools Required for DIY Air Conditioner Maintenance
Maintaining your air conditioner regularly can help prolong its lifespan and ensure optimal performance. To perform basic maintenance tasks, you will need a few essential tools. Here is a list of tools required for DIY air conditioner maintenance, along with tips on where to purchase them and how to safely use them.
Essential Tools for DIY Air Conditioner Maintenance
- 1. Screwdriver set: A set of screwdrivers with various sizes and types will be needed to remove panels and access different components of the air conditioner.
- 2. Fin comb: This tool is used to straighten bent fins on the condenser unit, allowing for proper airflow.
- 3. Coil cleaner: A foaming coil cleaner can help remove dirt, debris, and buildup from the evaporator and condenser coils.
- 4. Vacuum cleaner with a brush attachment: This can be used to clean the air filters, vents, and other components of the air conditioner.
- 5. Gloves and safety goggles: It’s important to protect your hands and eyes while working on your air conditioner.
Tip: You can purchase these tools from hardware stores, home improvement centers, or online retailers specializing in HVAC equipment.
Tips for Safe Tool Usage, DIY air conditioner maintenance guide
- 1. Always read the manufacturer’s instructions before using any tool to ensure proper usage and safety precautions.
- 2. Use the correct size and type of screwdriver to prevent damage to screws or components.
- 3. When using a fin comb, be gentle to avoid causing further damage to the fins.
- 4. Wear gloves and safety goggles to protect yourself from sharp edges, debris, and cleaning chemicals.
- 5. Ensure the air conditioner is turned off and unplugged before performing any maintenance tasks.
Cleaning Air Filters
Regular cleaning of air filters is crucial for maintaining the efficiency and longevity of your air conditioner. Clogged or dirty air filters can restrict airflow, reduce cooling capacity, and lead to higher energy consumption.
Importance of Clean Air Filters
- Ensure proper airflow: Clean air filters allow for better airflow, helping your air conditioner operate more efficiently.
- Improve indoor air quality: Dirty filters can circulate dust, allergens, and pollutants throughout your home, impacting air quality.
- Extend the lifespan of your AC unit: By regularly cleaning air filters, you can prevent strain on the system and prolong its lifespan.
Steps to Safely Remove and Clean Air Filters
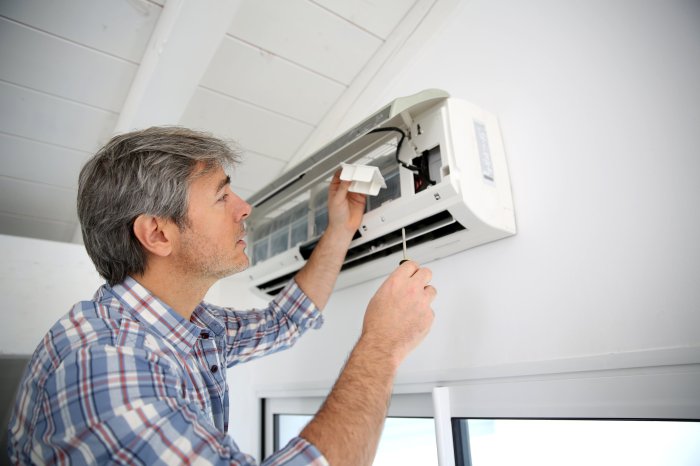
- Turn off the power: Before attempting to clean the air filters, make sure to turn off the power to the air conditioner to avoid any accidents.
- Locate the air filters: Air filters are typically located behind the front grille or within the air handler unit. Consult your AC unit’s manual for specific instructions.
- Remove the filters: Carefully remove the filters from their housing, taking note of how they were positioned for proper reinstallation.
- Clean the filters: Use a vacuum cleaner or gently wash the filters with mild soap and water. Allow them to dry completely before reinstalling.
- Reinstall the filters: Once the filters are clean and dry, place them back in their original position, ensuring they are securely in place.
Frequency of Cleaning or Replacement
It is recommended to clean or replace air filters every 1 to 3 months, depending on usage and environmental factors. Homes with pets or allergy sufferers may require more frequent cleaning to maintain air quality.
In the world of programming, the term “Hello world!” is often used as the first program a beginner writes. This simple program displays the message “Hello, world!” on the screen. If you’re new to coding, you can learn more about the significance of this phrase here.
Checking and Cleaning Condenser Coils
Condenser coils play a crucial role in the air conditioning system as they are responsible for releasing heat absorbed from the indoor air outside. Over time, these coils can become dirty and clogged, affecting the efficiency of the air conditioner.
When the condenser coils are dirty, the air conditioner has to work harder to cool the air, leading to increased energy consumption and higher electricity bills. Additionally, dirty coils can also cause the system to overheat and break down, resulting in costly repairs.
Step-by-Step Guide to Check and Clean Condenser Coils
To check and clean the condenser coils, follow these steps:
- Turn off the power to the air conditioner to ensure safety.
- Locate the condenser unit, usually placed outside the home.
- Remove any debris or vegetation around the unit that may obstruct airflow.
- Remove the access panel to expose the coils.
- Inspect the coils for dirt, dust, and debris buildup.
- Use a coil cleaning solution and a soft brush to gently clean the coils.
- Rinse the coils with water to remove any remaining dirt.
- Allow the coils to dry completely before reassembling the unit.
- Turn the power back on and test the air conditioner to ensure it is working efficiently.
Cleaning the condenser coils at least once a year can help maintain the efficiency of the air conditioner and prolong its lifespan. Regular maintenance of the coils will ensure that the air conditioner operates smoothly and effectively, providing cool air when needed.
Inspecting and Clearing Drainage Channels
Inspecting and clearing drainage channels in your air conditioner is crucial to prevent water damage, mold growth, and system malfunctions. Clogged drainage channels can lead to water leakage inside your home, reduced cooling efficiency, and even system breakdowns. Regular maintenance of drainage channels is essential for the overall performance and longevity of your air conditioner.
Locating and Cleaning Drainage Channels
To locate the drainage channels in your air conditioner, you can refer to the manufacturer’s manual for specific instructions. In most cases, the drainage channels are located near the evaporator coil or condenser unit. Once you have located the drainage channels, follow these steps to clean them:
- Turn off the power to the air conditioner to avoid any accidents.
- Remove the cover or access panel to gain access to the drainage channels.
- Use a wet/dry vacuum or a stiff brush to remove any debris or dirt clogging the drainage channels.
- Flush the drainage channels with a mixture of water and vinegar to remove any mold or algae buildup.
- Once the drainage channels are clean, replace the cover or access panel and restore power to the air conditioner.
Tips for Preventing Clogs in the Future
To prevent clogs in the drainage channels of your air conditioner, consider the following tips:
- Regularly inspect and clean the drainage channels at least once a year.
- Install a drain pan overflow switch to shut off the air conditioner if the drainage channels become clogged.
- Use a professional HVAC technician to perform annual maintenance on your air conditioner, including cleaning the drainage channels.
- Avoid placing objects near the air conditioner that could obstruct the drainage channels.
- Keep the area around the air conditioner clean and free of debris to prevent clogs.
Assessing Refrigerant Levels: DIY Air Conditioner Maintenance Guide
Proper refrigerant levels are crucial for the efficient operation of an air conditioner. Refrigerant is the chemical that absorbs heat from indoor air and releases it outside, allowing the air conditioner to cool the room effectively. If the refrigerant levels are too low, the AC unit will have to work harder to cool the room, leading to increased energy consumption and potential damage to the compressor.
Checking Refrigerant Levels
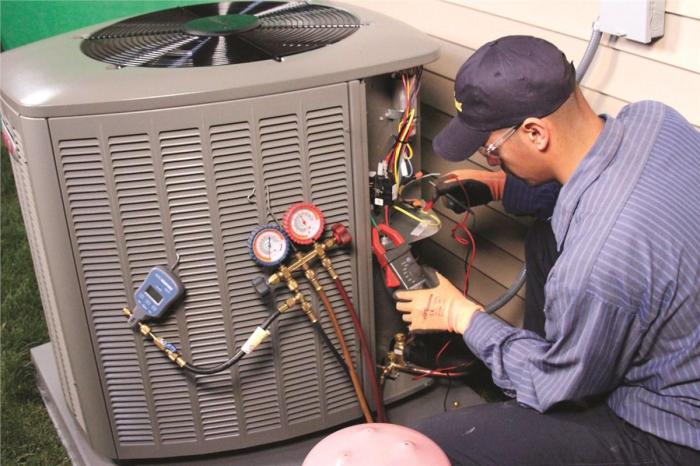
To check the refrigerant levels in an air conditioner, you will need a set of gauges specifically designed for this purpose. These gauges can be attached to the service ports on the AC unit to measure the pressure of the refrigerant. Ideally, this task should be performed by a licensed HVAC technician to ensure accurate readings and proper handling of the refrigerant.
- Turn off the air conditioner and let it sit for at least 15 minutes to allow the system to stabilize.
- Locate the service ports on the refrigerant lines of the AC unit.
- Attach the gauges to the service ports and take readings of the high and low side pressures.
- Compare the pressure readings to the manufacturer’s specifications to determine if the refrigerant levels are within the recommended range.
Low refrigerant levels can be indicated by decreased cooling performance, ice buildup on the evaporator coils, or hissing noises coming from the AC unit. If you suspect low refrigerant levels, contact a professional HVAC technician to inspect and recharge the system.
Maintaining the External Unit
Regular maintenance of the external unit of your air conditioner is crucial for its optimal performance. This includes cleaning the unit, ensuring proper airflow, and keeping it free from debris to prevent any malfunctions.
Cleaning the External Unit
To safely clean the external unit of your air conditioner, start by turning off the power to the unit. Remove any debris such as leaves, twigs, and dirt from the surrounding area. Use a gentle stream of water to clean the exterior of the unit, being careful not to damage any components. You can also use a mild detergent to clean stubborn dirt or grime. Make sure to dry the unit completely before turning the power back on.
Landscaping for Optimal Airflow
Proper landscaping around the external unit is essential for ensuring optimal airflow. Trim any bushes, shrubs, or trees around the unit to maintain a clearance of at least two feet on all sides. This will allow for adequate air circulation and prevent any obstruction to the unit’s operation.
Importance of Keeping the External Unit Free from Debris
Keeping the external unit free from debris is crucial for the overall efficiency and longevity of your air conditioner. Debris such as leaves, grass clippings, and dirt can clog the unit, restrict airflow, and cause the system to work harder than necessary. This can lead to increased energy consumption, reduced cooling capacity, and potential damage to the unit over time. Regularly cleaning and maintaining the external unit will help prevent these issues and ensure your air conditioner functions effectively.
Final Thoughts
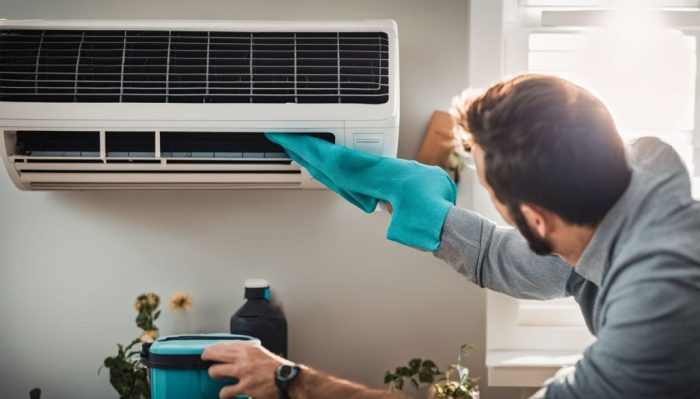
In conclusion, regular DIY maintenance of your air conditioner is key to its longevity and optimal performance. By following the steps Artikeld in this guide, you can keep your AC running smoothly and avoid potential breakdowns in the future. Stay proactive and enjoy cool, refreshing air all year round!
When it comes to programming, one of the first things you learn is the famous phrase “Hello world!” This simple yet powerful statement signifies the beginning of your coding journey. If you want to know more about the origins and significance of “Hello world!”, you can check out this informative article on Hello world!.